Search - Quick Tips


Guides


Creating Events
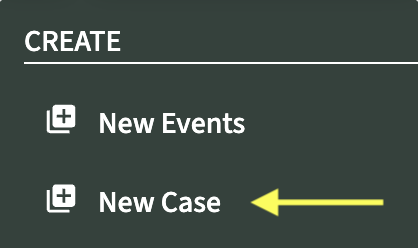
Creating a case...


Optionally, set custom details and notification preferences. Don't worry, you can always change this later. Optionally, set custom details and notification preferences. Don't worry, you can always change this later.

Case Details
Case Name: The case name will appear in the title/subject line of each event on your calendar.
Jurisdiction: If the jurisdiction you are looking for does not appear in the dropdown, click Subscription on the side bar to add the jurisdiction to your subscription.
Case Assignee: Choose the users you'd like to add to this case. When you're assigned to a case you're able to view the case and all the events related to the case even if the individual events are not assigned to you.
Add to Calendars: Choose the calendar(s) associated with this case. Adding a calendar at the case level will automatically add them to all deadlines you calculate on this case. You will have the option to remove these calendars or add other calendars when calculating a trigger.
Add to Dashboard: Choose the users associated with this case. Adding a dashboard at the case level will automatically add them to all deadlines you calculate on this case. You will have the option to remove these calendars or add other calendars when calculating a trigger.
After filling out the case details section, you can add custom information in the Custom Details fields. The text you enter when creating a case will automatically generate each time you calculate a trigger. You can edit, delete, or add to the custom details when calculating each individual trigger.

Custom Details
*These fields can be left blank*
Title: Text entered in the title field will appear by default after the case name and before the title of every deadline.
Location: Text entered in the location field will appear in the location field of your Outlook or Google calendar event.
Description: Text entered in the description field will appear inside the body of the event on your Outlook or Google calendar. This field will only be viewable after opening the event on your calendar. Example- Use this field if you have a case number or any information you want to include in every event for this case.
Notifications/Categories
Notification Reminders (Pop-Ups): Set the default for Pop-up reminders for this case. If you do not want Pop-up reminders, set this to “No Reminders.” You will have the ability to edit the reminders for each individual trigger and event.
Categories: If your firm uses Outlook categories, you can assign a default category for this case. You will have the ability to edit the category for each individual trigger and event. Adding categories to your cases, triggers, and events is optional. For more information about using Categories in DocketCalendar, click here.

You will be directed to the view case screen...

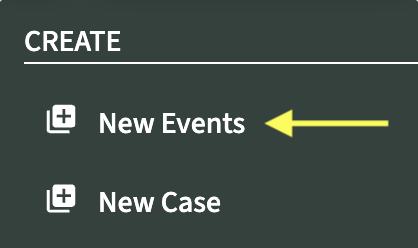
Creating events...


After selecting the case, the Jurisdiction and Custom Details fields will populate with the information you entered when the case was created.
Fill in the appropriate trigger details.

Trigger Details
Trigger: Virtually every deadline in a case is based upon an event spelled out in the procedural rules. The trigger is the action or event that generates the deadlines DocketCalendar creates. Trigger examples include Summons and Complaints Filed, Answer to Complaint Served, Trial, and Deposition.
Trigger Date: Select the date of the triggering item. If your event includes an appearance, select the time of the event. Only events classified as “appear or attend” will show a time on your calendar. All other events will appear as “All Day Events.”
Appointment Length: If your event includes an appearance, select the length of your event. The appointment length will only apply to events classified as “appear or attend.” All other events will appear as “All Day Events.”
Service Type: If the triggering event involved the service of court papers, select the service type that was used. You will be prompted to select a service type if applicable.
Trigger Name (Optional): If you want to change your trigger's name, edit the text here. This is primarily used if your case has multiple of the same triggers. I.E: Change the default trigger name “Deposition, Date of” to “Deposition of John Doe” so you can quickly identify the trigger when viewing all triggers on a case.


Custom Details
Title: Text entered in the title field will appear after the case name and before the title of every deadline. I.E: Use this field for the name of the deponent, or the specific details of your motion.
Location: Text entered in the location field will appear in the location field of your Outlook or Google calendar on every deadline. I.E: Use this field for the address or video conference links of appearances.
Description: Text entered in the description field will appear inside the body of the event on your Outlook or Google calendar. This field will only be viewable after opening the event on your calendar. I.E: Use this field if you have a case number and any notes you want to include on this trigger.
For more information about custom details and tips on using them, click here.


By default, all events will have a checkmark in the box to the left. The event will be added to your calendar if the box is checked. If you do not want to add an event to your calendar, click on the box to remove the checkmark.
Use the Select All check box to check or uncheck all events on the list.
Want certain deadlines to appear unchecked automatically? Click here to learn about excluded events.


Final edits and adding to calendar...


Click the pencil icon to edit the text, category, or pop-up reminder of an individual event. Clicking the pencil icon will clear out the original text of the event. Use the Copy button to return the original text and make any changes. Editing the Pop-up or category will only affect that event. Click the Save button before moving to the next event.


When you're ready click 'ADD EVENTS TO CALENDAR(S)


